Showing posts with label Images. Show all posts

Thursday, September 24, 2009

News of Note – September 24, 2009


  • PENTAX Imaging Company redefines the entry-level digital SLR category with the introduction of the K-x digital SLR. This latest PENTAX camera offers high-end features including Live View and HD video. And, since there’s no rule that SLR cameras must come in black only, the K-x will be available in a choice of white or black, as well as special, limited edition red and navy.
  • Priced at $649.95 USD (for body with DA L 18-55mm lens), the extremely compact and lightweight PENTAX K-x forges ahead on the trail initiated by the popular PENTAX K2000. With a one-handed shooting design and simple, easy-to-use operation, the K-x is perfect for users stepping up from a point and shoot digital camera to their first digital SLR.  Read More…


  • Chase Jarvis shares a trifecta of projects that he has been working on. It consists of  an iPhone App, a book, and a community of iPhone Photographers. The book title? “The Best Camera is the One That’s With You.” Read More…


  • New York, NY (PRWEB) September 23, 2009 -- Shutterstock, the world's largest subscription-based stock photo agency, announced that it has acquired BigStockPhoto, a leading credit-based stock photo agency, headquartered in Davis, California. Financial terms of the deal were not disclosed.
  • "BigStockPhoto is a leader in the stock photo industry, and an excellent fit for Shutterstock as we expand into the credit-based market," said Jon Oringer, founder and CEO of Shutterstock. "This addition will enable Shutterstock to better satisfy the diverse payment preferences of stock photo buyers worldwide."  Read More…


  • “Welcome  Back to 1999:” Here is an interesting take by Syl Arena about the still camera’s move to digital capture. He says that those few puffs of clouds you see on the horizon are the beginning of a storm that we cannot quite see yet. But like 1999 and film photography, this storm will do to still motion what digital did to film. Here comes Harry Potter’s Daily Prophet. Read More…

Friday, February 20, 2009

Software Review: Kubota AutoAlbum V3 From Kubota Image Tools


One of the hotter trends in wedding albums is what is called the magazine style. It is a digital photo album that is flush mount and is constructed of a hard bound cover and ridged pages. The flush mount album doesn’t have matted pages and is much like a cross between a traditional wedding album and a coffee table book.

Kubota AutoAlbum V3 is a software program that assists you in creating a magazine style album easily and elegantly. The product consists of software and a layout book. The software contains over 500 different layouts and the Kubota Dashboard for interfacing with the product and automating the process of creating your pages. The layout book gives examples of the layouts.

Kubota Pro PakThe program is pretty simple and easy to use. You first activate the Kubota Dashboard for the AutoAlbum. This brings up the selector tools. As you can see in the image you are given a selection of formats.

You have square pages which are created as 10"x10" and can be resized anywhere from 5"x5" to 12"x12". You have square panoramas that are created as 10"x20" and can be resized from 5"x10" to 12"x24". Finally you have 11"x14" rectangle pages.

To get an idea of what the finished pages will look like you can look into the book that contains the page designs. You can also look on the dashboard at each of the codes and as you highlight a code, the layout is displayed in the dashboard as well. The one that I have highlighted is 2010-H0V4RV which translates to 0 horizontal images, 4 vertical images and the template is a rectangle format and vertical in position.

Now before you begin your album, the images need to be prepared properly in Photoshop. They should be color corrected, any retouching or enhancing should be complete as well as any sharpening done.

You then need to take you finished images and make sure that you have a copy because the Kubota AutoAlbum will place each image as a Smart Object on the page and therefore it still remains editable in the page layout.

Once you select your layout and click apply, you will then be prompted to select the images for the pagKubota Pro Pake one at a time. In the page illustrated here, the three small images were selected and then the lager one. When the larger one was selected, I was prompted to crop the image for it to fit below the smaller ones. Once done, you are prompted to save it as a .PSD file.

It really was that simple. There is a link to see what some of the page layouts look like on the Kubota site, and although it is for version two, it does give an idea of what you can accomplish with Kubota AutoAlbum V3. It sells for $399 and can be purchased at the Kubota Store.

If you are a professional photographer, especially one who does weddings, portraits, or graduations, you really owe it to yourself to check into the Kubota AutoAlbum, or any of the Kubota products for the photographer. They will allow you to get the maximum productivity with the least amount of effort. I think that the Kubota AutoAlbum will pay for itself in time savings and customer satisfaction over and over again. I highly recommend this product.


Technorati Tags: ,,

Thursday, February 19, 2009

Software Review: Kubota Pro Pak from Kubota Image Tools, Part 2

The Kubota Pro Pak is a bundled package of products that contains six of the most popular tools from Kevin Kubota's professional image enhancing tools for Adobe Photoshop. This package includes the four Artistic Series of actions, his Production Tools, as well as his Formula Book which contains 42 separate recipes to get just the look you want.

Kubota Pro PakIn part one, I looked at the four paks that are called the Artistic Tools. In part two, I will look at actions the Production Pak and the Formula Book. In case you are not familiar, a Photoshop action is an automated series of steps that have been recorded to provide an effect or series of effects. Some of these actions are totally automated, others have stopping points that request you to perform some action, usually to paint in where you want some sharpening to occur. In all cases there is a pop-up window that tells you what you need to do.

Production Tools Volume 2

In this Production Tools you will find a variety tools that are geared to getting your images back to your clients much faster through the automation nature of Photoshop actions. There are a variety of tools that come with this pack including ones for making adjustments, retouching, finishing, sharpening, and logo placement.

Like with the other tools, everything here is run from the DASHBOARD. This is a separate panel that contains everything you need to work with all of the Kubota tools. You can filter based on the Pak, or you can use the search facility to find an action based on the name or type of action. This can be very helpful when you are using the Formula Book and are not sure from which Pak particular action exists. They have a video on their Web site if you want to see the DASHBOARD in action.

Kubota Pro PakThe Production tools are set up in sections so as to help facilitate your workflow from beginning to end. The first area is the Adjustments section. Here you are told to make any tonal adjustments and basic color corrections to your image. In this section, you can use actions to reduce noise, lighten your overall image, remove magenta casting from skin tones, paint out shadows, and an action to bring out shadow detail.

There is a retouching action that prepares the necessary layers for retouching portraits. There are instructions for what to do with the layers are displayed as sticky notes. As you can see in the image, when the portrait action is run, the layers are created, and a note explaining what you need to on each one is provided.

There is a section that focuses on finishing your images by creating borders around your image. There is a section that will help you interpolate your image by sizing your image up or down; there are ones that will place your image (either horizontal or vertical) into a matted 8x10 (both 250 DPI and 300 DPI).

There is an action in which you can embed the image filename in onto the image, as well as one that will let you place your logo on to various positions one the image. Finally there is a selection of sharpening actions that automates various levels of sharpening to your image.

Kubota Formula Book

Kubota Formula Book is a spiral bound book of 42 recipes from Kevin Kubota's magic bag of tricks. Included with this book is a companion DVD that contains a video tutorial for each of the formulas that will walk you through the creation of the final image in Photoshop.

Each page contains a before and after image so you can see the results. There is a story behind the image. Many of these are interesting in how the shot was captured and the reason why. I personally liked the one where Kubota is sitting on the trunk of a moving car to capture the image with his feet strapped in the rear passenger seat belts, while the bride and groom are in the middle of a kiss. Oh, and the groom is driving.

All of the metadata on the exposure, ISO, lens type, etc. is provided along with the steps and actions needed to create the image. Another interesting point about this book is that it is set up in such a way that future "add-on Paks" are planned for the future and you will be able to add these to the book. The image below was created using formula number three which is called "Daisy Duke."

Kubota Pro PakWhile the biggest problem with having all of these actions is learning when to use what combination of actions and tools, the Formula book is an enormous help. I like the way it is laid out and professionally done. With the DVD tutorials, it makes learning these tools a cinch. The Power tools, like the Artistic tools, are very easy to use and make a lot of mundane chores automatic.

If you are a professional photographer, especially one who does weddings, portraits, or graduations, you really owe it to yourself to check into the Kubota Pro Pak, or any of the Kubota products for the photographer. They will allow you to get the maximum productivity with the least amount of effort. Even if you only use a small portion of the effects, they will pay for themselves in time savings and customer satisfaction over and over again. I highly recommend this product.


Technorati Tags: ,,,

Wednesday, February 18, 2009

Software Review: Kubota Pro Pak - Part 1 From Kubota Image Tools

The Kubota Pro Pak is a bundled package of products that contains six of the most popular tools from Kevin Kubota's professional image enhancing tools for Adobe Photoshop. This package includes the four Artistic Series of actions, his Production Tools, as well as his Formula Book which contains 42 separate recipes to get just the look you want.

Who is Kevin Kubota and what makes his actions so special? Well first off he was named one of the top ten wedding photographers of 2007 by Popular Photography Magazine for giving his customers more than they expect by capturing fresh, expressive images. He has now taken that philosophy to Photoshop processing by providing the same techniques to you via his image tools.

Today Kubota Pro PakI will look at the four actions sets known as the Artistic Tools. In case you are not familiar, a Photoshop action is an automated series of steps that have been recorded to provide an effect or series of effects. Some of these actions are totally automated, while others have stopping points that request you to perform some action, usually to paint in where you want some sharpening to occur. In all cases there is a pop-up window that tells you what you need to do.

Artistic Tools Vol. One: The "Classic Film Effects" Pak
In this pak you will find a variety of Black & White Actions, organic film grain, cross-processing effects, sepia effects, and monochrome toning. This set contains over 40 Actions and it includes Skin Cream, Fuji Snappit, Vignette, as well as Eye and Teeth Enhancer.

The black and white effects include conversions that give nice film grain effects without introducing digital noise. In this way they look much more organic and have a better feel. There is not a loss of sharpness and in fact many times the sharpness appears enhanced. There are actions that smooth skin, add glow to the image, add a Hollywood effect, as well as other creative effects for a vignette, giving a romantic feel, and adding vibrancy to the image.

There are color actions that can add a bright sunny effect, a cross processed look, and a contrasty Fugi Velvia film look. There are also image correction actions that raise the shadow values, lower contrasts and saturations, adding warming gel filters to add mood to an image, as well as a mid-tone brightener. There are even actions that will attempt to fix images shot with the wrong white balance. There are examples of "Classic Film Effects" Pak on the Kubota Image Site.

Artistic Tools Vol. Two: The "Modern Chic" Pak
This pak includes what has been known as Lord of the Rings series and is one of the most popular of the Kubota Actions and is what helped make it a HOT ONE award winner. Also it also contains enhancements that give your images color pop, colorful toning, soft glowing and innovative black and white effects. This pak contains over 50 enhancements including Daily Multi Vitamin, Radiant People, Radiance Landscape, Edge Burner, Digital Fill Flash and Smokeless Burn.

Kubota Pro PakThese actions under Black and White will give you the ability to work with a modern antique look that will have the user wondering if it is really black and white or color. There are some that will tone your black and white to blue, green, red, and other tones as well as ones to create a more traditional black and white image.

The color effects will help you add 'Life' to everyday images. The Lord of the Rings series aims to mimic the deep, romantic feel of the movie by adding color richness, a soft glowing effect, and contrast. There are several variations on this one.

The Creative effects include one that gives a painterly effect, another with a canvas texture, one that gives an angel glow, one that burns the edges, and one that performs an edge blur. The Image corrections include one to eliminate posterization problems, one that adds digital fill flash, a smokeless burn that works just the opposite of flash fill, one to work details, one to reduce noise, and one that works skin tones.

There are also a set of image bordering actions that will create 4x6 images with borders for printing proofs. There are examples of "Modern Chic" Pak on the Kubota Image Site.

Kubota Pro PakArtistic Tools Vol. Three: The "High Fashion-Edgy" Pak
In this pak while there are a lot of enhancement tools that can be used to work on "everyday" images, you will also find a series funky high fashion looks, glowing and deeply romantic black and white effects, and color styles. This pak contains over 45 enhancements, including Fashion Passion, Kiyoko Punch, Tea Stained, Anime Soft, Anime Bold, Doll Face, Skin Powder Genie and Eye Color Enhancer.

The black and white actions include ones that lighten up the skin tones, add rich warmth to the shadows, have some bronze toning and combine velveteen with a black satin look.

Color effects include a Hollywood glow effect is works for fashion and outdoor scenes, a cross processed look that has more pleasing skin tones than the traditional, a dramatic old world look, a high key contrast that is bold and sassy, a tea-stained look, and a 'Look' that is gentle enough to use every day, but has the punch to make your images pop.

Creative effects include a glow that is made for children, graduates, and fashion images, a look that emulates half photo, half painting, a rich and moody forest look, a soft wash, and a wash-out look. The image corrections include a dark line eraser to remove things like shadows from eyes, an eye color enhancer, a skin powder genie to get that cover girl smoothness, as well as an overall helper to restore detail on a slightly overexposed image.

Again there are also a set of new image bordering actions that will create 4x6 images with borders for printing proofs. There are examples of "High Fashion-Edgy" Pak on the Kubota Image Site.

Kubota Pro PakArtistic Tools Vol. Four: The "Cutting-Edge" Pak
This is a collection of modern image enhancing tools for producing unique looks in the marketplace. There is a three-dimensional "Enter the Dragon" all the way to a cinematic "300-esque." Also, there are new interactive B&W converters for the attempting the perfect tonal blend and richness within your images. This pak contains over 50 enhancements, including BW Full Moon, Highlight Enhancer, Dark Darkener, Popsickle, Punch Drunk, China Doll, Comic Relief, Vignette 2 Auto and Ragged Edges.

The black and white effects include ones with an infrared feel, one with deep blacks, one that allows you to fine tune the tonality of different colors before conversion, one gives a more edgy bold look, and one that you can give a subtle hint of color.

The color effects include "Enter the Dragon" series that gives a three-dimensional, edgy, bold look with lots of texture; one that is more soft and romantic; one that enhances details and removes haziness from your image; the "300-esque" series that attempts to capture the movie's warm perpetual sunset and soft film grain look; and there is one that gives an old London town look.

The image corrections include a contrast brush to paint contrast into areas that need that oomph, highlight rescue where you paint to bring out the highlights that are not there, a Dark Darkener for painting on areas that need to be darker, and a Luminizer for opening up the shadows.

In this pack you also get a series of edges and vignettes for darkening edges and bringing out the focus of your image. There are examples of "Cutting-Edge" Pak on the Kubota Image Site.

Obviously there are too many actions to do more than highlight what each pak contains here. You can get online to evaluate everything for yourself, but with the fact that you have over 40 actions per pak and you can combine them with each other, using multiple actions to create different looks, you really have a limitless array of effects that you can create.

The biggest problem I see with having all of these effects is knowing what to use and when to use it. Obviously, the final results will come from experimentation and trial and error. One thing that helps is that the samples from the Kubota site are a great starting point. It appears that there will eventually be tutorials as well, which will be even better. In part two, along with looking at the Production Tools, I will look at the Kubota Formula Book that gives you 42 step-by-step recipes for getting that certain look and, to me, that is something else that will help the learning curve tremendously as well.

If you are a professional photographer, especially one who does weddings, portraits, or graduations, you really owe it to yourself to check into the Kubota Pro Pak, or any of the Kubota products for the photographer. They will allow you to get the maximum productivity with the least amount of effort. Even if you only use a small portion of the effects, they will pay for themselves in time savings and customer satisfaction over and over again. I highly recommend this product.


Technorati Tags: ,,

Tuesday, January 20, 2009

Product Review: ColorMunki From X-Rite

Written by T. Michael Testi

To paraphrase an old Beatles song, "Everyone has something to hide except me and my ColorMunki!" What do I mean? It is the hidden colors that exist in your photo, and because of any number of reasons, don't show up either on your monitor and/or on your printer, because they are not calibrated correctly and together. That is what the ColorMunki can do.

ColorMunki is the latest offering in the profiling and calibration market from X-Rite corporation and it brings some exciting capabilities to the prosumer photographic market as well as to the graphic design community. There are three models of ColorMunki, the ColorMunki Create, the ColorMunki Design, and the ColorMunki Photo.

Just what is a ColorMunki? In the case of the latter two, it is a full circle calibration and profiling product that makes round tripping from your monitor to your printer affordable to non-professional photographer and designer. It runs on Windows 2000, XP Vista with a Pentium IV/Athlon XP or better, or Mac OS X (10.4 or higher) G4 or higher processor, you need a powered USB port, a color monitor with 1024x768 or greater resolution, 16-bit video card (24-bit recommended), 512 MB RAM, and 300 MB of hard-drive space.

 ColorMunki Photo

There are really two types of ColorMunki. One is geared for Photographers and the other two are targeted to graphic designers and illustrators. The version that I am reviewing is for photographers and is called the ColorMunki Photo.

The ColorMunki functions in two main areas. One is for monitor calibration and the other is for printer profiling and calibration. Anyone who has worked with photographs for any length of time is familiar with the problem with getting the image from the camera, through the computer and on to the printer and having it come out reasonably close to looking like what like what you shot.

One thing to note is that because of the fact that my screen and printer are calibrated differently than yours, there is no way for me to display my results and guarantee that you will see anything close, so all that I can do is explain the process. The company who makes ColorMunki has been making profiling devices for many years and is well established in the professional market and so they bring a lot of respect and reliability to this new device.

When you get the ColorMunki, you get a USB spectrophotometer; that is based on the much more expensive i1 Pro product from X-Rite. It is zipped in a pouch with a sandbag handle. It looks about the size of a construction grade tape measure. You also get a small manual and the installation software. The CD only contains a downloader so you will need an internet connection to get the latest version of the software; and since this is a new product you will definitely want to keep up with updates. The product license also allows you to install and activate ColorMunki on 3 separate computers.

 ColorMunki Photo

After installing the software, to use the ColorMunki as a monitor profiler you select ColorMunki icon and you are presented with three options. The first is for round tripping between the monitor and the printer; which is probably what you will want to do when you first set up the system. The second option is for monitor calibration; which you will want to do on a regular basis, and the third is for printer calibration. Because the first option encompasses the latter two, I will focus on the second two as individual steps.

The beauty of the ColorMunki system is that it walks you through everything that you need to create a color calibrated monitor. Once you make a couple selections you are requested to hang the product over a spot on the monitor and the system takes over. Basically what happens is that the software displays specific colors on your monitor and the ColorMunki uses its spectrophotometer to measure the colors displayed for correctness. After it completes its process it then gives you the opportunity view the before and after results. You are then asked to save the profile.

 ColorMunki Photo

Part two is the profiling of your printer. This consists of printing a test chart that contains 50 sample colors in five strips of ten. Once the test chart is printed, you are asked to wait for 10 minutes for the sample to dry; the system puts a timer on the screen which can be overridden if need be. This is where you will need to use some judgment because the longer you wait for the image to dry the better your representation will be, but that could lengthen your workflow because that will also be how long you will need to wait for your actual images to dry to see if your colors are matching.

When profiling you are given the option to create a new profile or optimize an existing profile. One thing to note, you will need to create a new profile for each printer/paper/ink combination. For most people this will really be one printer, one type of ink, and multiple papers. In this case, you will need to create one for each type of paper. Again the ColorMunki gives you options.

Once you select your printer, you will give your profile a name. This will usually identify the type of paper; possibly ink if you are using multiple ink systems. You are then asked to print the 1st test chart. One thing to pay attention to is that you will need to turn off any kind of printer color management that your printer supports. You will need to look to your printer documentation or online support to find out how to accomplish this. If your printer software allows you to, you should save this as a profile within your printer setup because you will need to do this for every test strip you print as well as when you print from your application. One thing to note here is that at this point, the ColorMunki profiles are geared toward printing in Photoshop and QuarkExpress.

 ColorMunki Photo

Once everything is set, you print your test chart and wait 10 minutes for your sheet to dry. Once it is dry, you take the ColorMunki out of its pouch and place it at the bottom of the first of the five test strips. You can see the example. There are also videos available that show you how as well. On the screen you see a yellow box around the first test strip. You hold the button on the side and slide the unit somewhat slowly over the strip. When you reach the end, you release the button and on the screen you will see either a green or red box around the strip. If it is green, the box moves to the next strip. If it is red, then you will need to rescan the strip. When the color turns back to yellow, you can then rescan.

Once you successfully scanned all of your strips you will be asked to do this again to a second test strip. You will need to select the same setup profile to your printer that you used before. You then print the new strips, dry them, and repeat the scanning. The other option that you can use is to optimize a print profile. What this does is lets you choose an image to further enhance your profile. If you do a lot of portraits, you might choose an image with skin tones, or landscapes, one with outdoor colors. You then print an additional test strip with colors based on this image and scan it for greater accuracy of print rendering.

In most cases, no additional scanning is necessary, or perhaps round one of the image-based optimization will be enough for most people. Without going into too much detail, what this additional scanning does is allows the ColorMunki to target a specific color area in the printer's gamut. If your device is "well behaved" and the colors are linearly spaced when color management is turned off, then the initial profile should perform very well. If not, you may want to experiment for better precision of your color space.

One of the benefits that I really liked in using the ColorMunki is that you have the choice to spend as much or as little time to get much better prints. The optimization allows the ColorMunki to figure out what is going on inside the printer gamut and more accurately characterize the color presented in your photos. It is important to note that you must be consistent with your printer setups or your profile will take a left turn and your output will look nothing like what you intended when you use the profile. While the ColorMunki is a complex device, once you catch on to making sure that a few things are correct, your output will be so much better and reflect more accurately what you see on the screen.

Some other capabilities of the ColorMunki Photo include what is called a "DigitalPouch" program that will let you send images and photos to a client, friend, coworker in a digital package and this package will alert them when they are viewing the content in an environment were the color management is not setup correctly and the colors may not appear correctly. The ColorMunki also has the ability to do 'spot' color measurements that in turn let you use those measurements to build up palettes and color schemes. The ColorMunki also calibrates projectors as well.

There are three models of ColorMunki. I have described the Photo version which was designed with the emphasis on screen-to-print color matching. The other two are more geared toward a color selection, palette creation, and a palette management tool. When you launch the ColorMunki Photo you are presented with a profiling tool, and you have the option to use a color picker tool. With ColorMunki Design however, you first are directed to the powerful tool for color selection and palette creation, and the profiling is just a small button away.

The third product is ColorMunki Create and while it, too, is aimed at the design community, it comes with a colorimeter as opposed to the spectrophotometer. The display profiling option has been simplified quite a bit by removing many of the options, and there is no printer calibration as well.

My personal view is that the ColorMunki is a very welcomed and much needed product in this price range; $499.00 USD for the ColorMunki Photo and ColorMunki Design, since there is not a lot out there under $1000 that does full circle calibration and profiling. The ColorMunki Create is $149.00 USD.

It took a little bit of experimentation to learn how to use the product, but once I spent the time, I have been generating some of the best images from my system to date. From my understanding this learning curve will get smaller as X-Rite adds videos and additional training information to their site along with more in-depth customer support.

I guess at this point, if you have spent hundreds to thousands of dollars on your camera, more on your lenses, another $500 or more on your printer, why would you not own a ColorMunki to get the best output possible? Don't let the most accurate colors of your image hide in your printer; bring them out with ColorMunki. I very highly recommend the ColorMunki.


Monday, December 29, 2008

Software Review: Adobe Photoshop Plug-In DxO FilmPack 2 from DxO Labs

Written by T. Michael Testi

With the latest release of DxO FilmPack version 2 from DxO Labs you now can not only add the style and beauty of classic films to your images, but you can now add additional traditional film effects giving you more capabilities to replicate the look and feel to real film. DxO FilmPack is a plug-in that gives digital images both the look and the grain of conventional films.

OK, I know what you're asking! I gave up film (or never used it) because of all the graininess and the color differences, why would I want to start making my images look as though they were taken on film? Well, one reason is for artistic license. You may want to give an image that fresh-from-the-fixer look. Another reason is that you may want to integrate film images and digital images and you need some method to get a more consistent look for all.

DxODxO FilmPack recreates the color and grain of over 50 classic film types. These include Kodachrome, Tri-X, Velvia, and Illford. These films were analyzed and reproduced so that they could be applied with just one stroke of the keyboard. The package also offers access to several toning filters to transform any digital image into a toned print. These include Sepia, Terra Sepia, Ferric Sulfate, Gold Sepia, Gold, and Selenium.
DxO labs has a complete list of the available film looks, and they break down into nine categories. color positive films, generic positive films (without grain profile), instant color positive, black and white films, color negative films, instant black and white films, color filters, black and white filters, and tonings.

DxO FilmPack can be used as a standalone product or from the filter menu within Adobe Photoshop. The user interface is self-explanatory. You have drop-down lists and sliders. You choose an emulsion and the filter applies the color and the grain of the film to your image. You are presented with a preview on the screen so you can see what it looks like.


You can mix the color of one film with the grain of another. You can also adjust the grain of the film manually or you can match it with a 35mm, medium format, or large format look. There is also a special profile called "Cross-Processed" renderings. This is a specific development mode which consists of processing slide film with the treatment chain adapted to negative film and vice versa. This gives you a lot of room for experimentation.

DxOWhat is new in version DxO FilmPack 2? First off there are 27 new film types. These include 10 slide films, 5 color negative films and 12 black and white films. These 27 also contain 7 new instant films (Polaroid and Fuji) and 3 Infrared films (Kodak, and Rollei). There are also 8 new color filters (Green, Yellow, Orange, Dark Orange, Blue, Red, Cool tone and Warm tone) providing you with even more post-processing possibilities and additional creativity.

While DxO FilmPack 2 is not going to be used for every situation, it does provide for a lot of creative artistic expression. It is very easy to use and very functional. My only complaint is that you still cannot create your own formulas and save them. If you get a specific look and feel, you have to reset it for each image you want to process. On the other hand if you need to match film-based images for a presentation, or if you want some unique creative license to experiment for a different look and feel for that film look, then DxO FilmPack 2 is the product for you.


Friday, December 26, 2008

Video Training Review: Illustrator CS4 New Features with Mordy Golding from Lynda.com

Written by T. Michael Testi

Alright, you know Illustrator pretty well, but they just came out with a new version called Illustrator CS4. The question is, how exactly do you get up to speed with all of the new features without having to hash through the old just to find the differences? Well, just ask Mordy! Get online at Lynda.com and in Illustrator CS4 New Features, he will show it to you.

Mordy Golding has put together a short course that focuses just on the new features of Illustrator CS4. As a leading expert in Illustrator, he covers the latest developments in Adobe's vector image editor, and he leaves no stone unturned. This course lasts 1.25 hours.

The first thing that the instructor covers is the changes in the interface. Adobe has been working hard at trying to get all of their products as unified as possible, and here he covers the changes. He then moves on to the use of new multiple artboards. This is a feature that a lot of people have been wanting for quite a while. Here you are shown why you would want to use them, and how to create a set and interact with them.

The appearance panel has had a major overhaul in Illustrator CS4, as well as some of the other Adobe products, and here you are shown why it now becomes a focal point in your workflow. It will help you eliminate the need to trudge through menus. Next he looks at the new capabilities of graphic styles like the ability to add-on graphic styles to existing Lynda.comstyles in a compounding manner.

Clipping masks have made it so much easier to select and mask objects in Illustrator and here you are shown techniques in which you no longer have to lock and unlock layers to get the right object. The instructor then explains the new Blob brush. He first reminds you about the problems with the painting methods in past versions. Then you are exposed to what you are now able to do with the new Blob brush, and how it can make many things you do much easier.

Other topics covered include:

  • Transparent Gradients and how they are much more flexible in CS4.
  • The Smart Guides, which give you information as you work and are turned on by default in CS4.
  • The Separations Preview examines the printing and proofing abilities in this version.
  • The Isolation mode, which will let you isolate a specific path from the rest of the document.
  • The Connect Now ability in CS4 that allows you share your screen with someone else on the Internet.
  • And finally the Kuler which finds sets of colors based on themes that can be added to your swatches panel.

Illustrator CS4 New Features is another high quality training video from Lynda.com that gives you the ability to get up to speed on the new features of Adobe Illustrator. Now if you are new to Illustrator and really need to know all about it, there is also a full eight-hour package called Illustrator CS4 Essential Training from Lynda.com as well by the same instructor.

The online training Illustrator CS4 New Features comes in three flavors. At $25/month you get all of the videos that are available online (approximately 21,811 videos on 318 topics at this time). Annually, $250 for Standard gets you all the videos.  For $375, the Premium subscription gets you all the videos as well as all of the exercise files. Take note that the exercise files are only included in the Premium annual subscriptions.

You can use Illustrator CS4 New Features as a training program for the individual student, as well as the college or vocational teacher looking to supplement their educational materials. It is of benefit to anyone who needs help understanding Illustrator CS4. You can also try out a couple of the videos for free at Lynda.com.


Thursday, December 25, 2008

Web Site Review: Adobe Photoshop.com

Written by T. Michael Testi

Photoshop.com is the new companion Web site to Photoshop Elements 7 and Premiere Elements 7. The goal of Photoshop.com is to extend the capabilities of your Elements experience by giving you a place to store and share your creations. They offer templates and tutorials that can be delivered to your software on a regular basis. It will let you backup and store your images and videos online, as well as allowing you to access these items anywhere you are.

There are two types of memberships to Photoshop.com. The first is a basic membership and it is absolutely free. It gives you 2GB of storage space where you can upload, view, edit and access your images anytime you have an Internet connection. You do not have to purchase Photoshop Elements or Premiere Elements to join, and if you want more storage space, you can purchase up to 100GB for an annual fee.

Photoshop.comThe second type of membership is the Photoshop.com Plus membership. This requires the purchase of either Photoshop Elements 7 or Premiere Elements 7, and requires a $49.99 annual fee. For this you get 20GB of storage space, seasonal art, themes, additional tutorials that will be downloaded to your desktop, and the ability to automatically backup your photos and videos from your desktop. For this membership as well you can purchase extra space. I will be referring to the Photoshop.com Plus membership in this review.

What Are the Features Available at Adobe Photoshop.com?

Showcase your photos by using a wide range of the latest artwork and templates that can be delivered to your desktop automatically. Want to make a photo card? Add clip-art to a photo? Put a frame around a favorite picture? It is all right here for you to access.

Cinematic inspiration for your videos is here as well if you are using Premiere Elements 7. With a Plus membership you will get the latest movie themes, sound effects, music, overlays, menu templates, and special effects.

Tutorials will let you learn as you go along. You can find out how to give your creations a more polished look, or if you want inspiration to learn how to do something new.

New ideas will give you new ways to create images. You will get tips and an assortment of seasonal artwork, themes, and special effects that are useful to whatever you are doing.

Automatic backups will keep your memories safe. No scheduling required. You just tell Elements what you want backed up and it will handle the rest.

Show off your work from any Web-enabled computer. You don't have to take along the pictures, you have them with you from any place you can access the Internet.

Galleries will let you set up both private and public galleries. If you already have a Flickr, Facebook, Photobucket, or Picasa site, no problem. Photoshop.com will hook you up and tie them back in so you can work with those images as well.

Photoshop.comI found Photoshop.com very easy to work with and use. It ties nicely into Photoshop Elements 7 and Premiere Elements 7 and makes everything seamless to use. I found that it was very easy to tie into my existing Flickr account, and after giving my approval for Photoshop.com to access my photos, all of my images were available. I could go in and do all sorts of image adjustments like fixing white balance, cropping, resizing, converting to black and white, and much more.

The fact that you can tie your phone and its photos to Photoshop.com is also an added plus. For many, the themes and other goodies that are available for use will be of big benefit. I also like the different plan levels that let your storage size grow as you need it to. If you use Photoshop Elements 7 or Premiere Elements 7, then you owe it to yourself to check out Photoshop.com. Even if you don't own one of these, I think that you will be quite surprised by what you can do with Photoshop.com. I heartily recommend this site.


Friday, October 31, 2008

Book Review: Ansel Adams - 400 Photographs, Edited By Andrea G. Stillman

Written by T. Michael Testi


Ansel Adams: 400 Photographs is one of those monumental undertakings not only because of the man who created this body of work, but because of the volume of his body of work, and the number of people he influenced. To try to pare this down to 40 (Examples: The Making of 40 Photographs by Ansel Adams) or in this case 400 photographs takes time, effort, and dedication.

For those who may not know of Ansel Adams, or whom have only heard his name with relation to photography, he was the most honored American photographer of the twentieth century. Once destined to become a concert pianist he instead chose photography. Over the course of the next 50 plus years he defined the art of photography.

400 Photographs constitutes a study in that life. The book is 440 pages long and, as the title states, contains 400 of Adams' finest photographs. The book is arranged into five major periods which correspond to his growth as an artist. It is edited by Andrea Stillman, a close associate and editor of seven of Adams' books. 400 Photographs starts with an introduction in which Stillman gives a brief overview of Ansel Adams' life.

"1916-1930 – Yosemite and the High Sierra" begins when Adams was 14 years old and he visited Yosemite for the first time. He had his first camera, and on this trip he recorded a "visual diary" of where he had been. This chapter begins with some of the images he took and of the album he had made with his father. Some of these are very rare images including one of his first of "Half Dome." You can see the growth of his work between 1918 and 1927 as he developed from simple records of scenery to more artistic expressions. In 1927 he began the process that would later become "visualization." It was here that he began to photograph with much more authority and you can see the new power that his images gained.

"1931-1939 – Group f/64 and Alfred Stieglitz" shows the influence of a loose group of West Coast photographers that included Edward Weston and Imogen Cunningham called Group f/64. This group promoted "straight" photography as opposed to the "pictorialist" methods that were in vogue at the time. They were trying to define photography as an art form by simple and direct presentation as opposed to photography as relating to painting and graphic arts.

During this time the compositions of Adams' photographs began to change. He tried to present his subject in as straightforward manner as possible. He also lowered his horizon now including cloud filled skies. It was also during this time that Alfred Stieglitz, the director of America's foremost gallery of modern art, An American Place, exhibited Adams' photographs which took Adams' work to a larger audience.

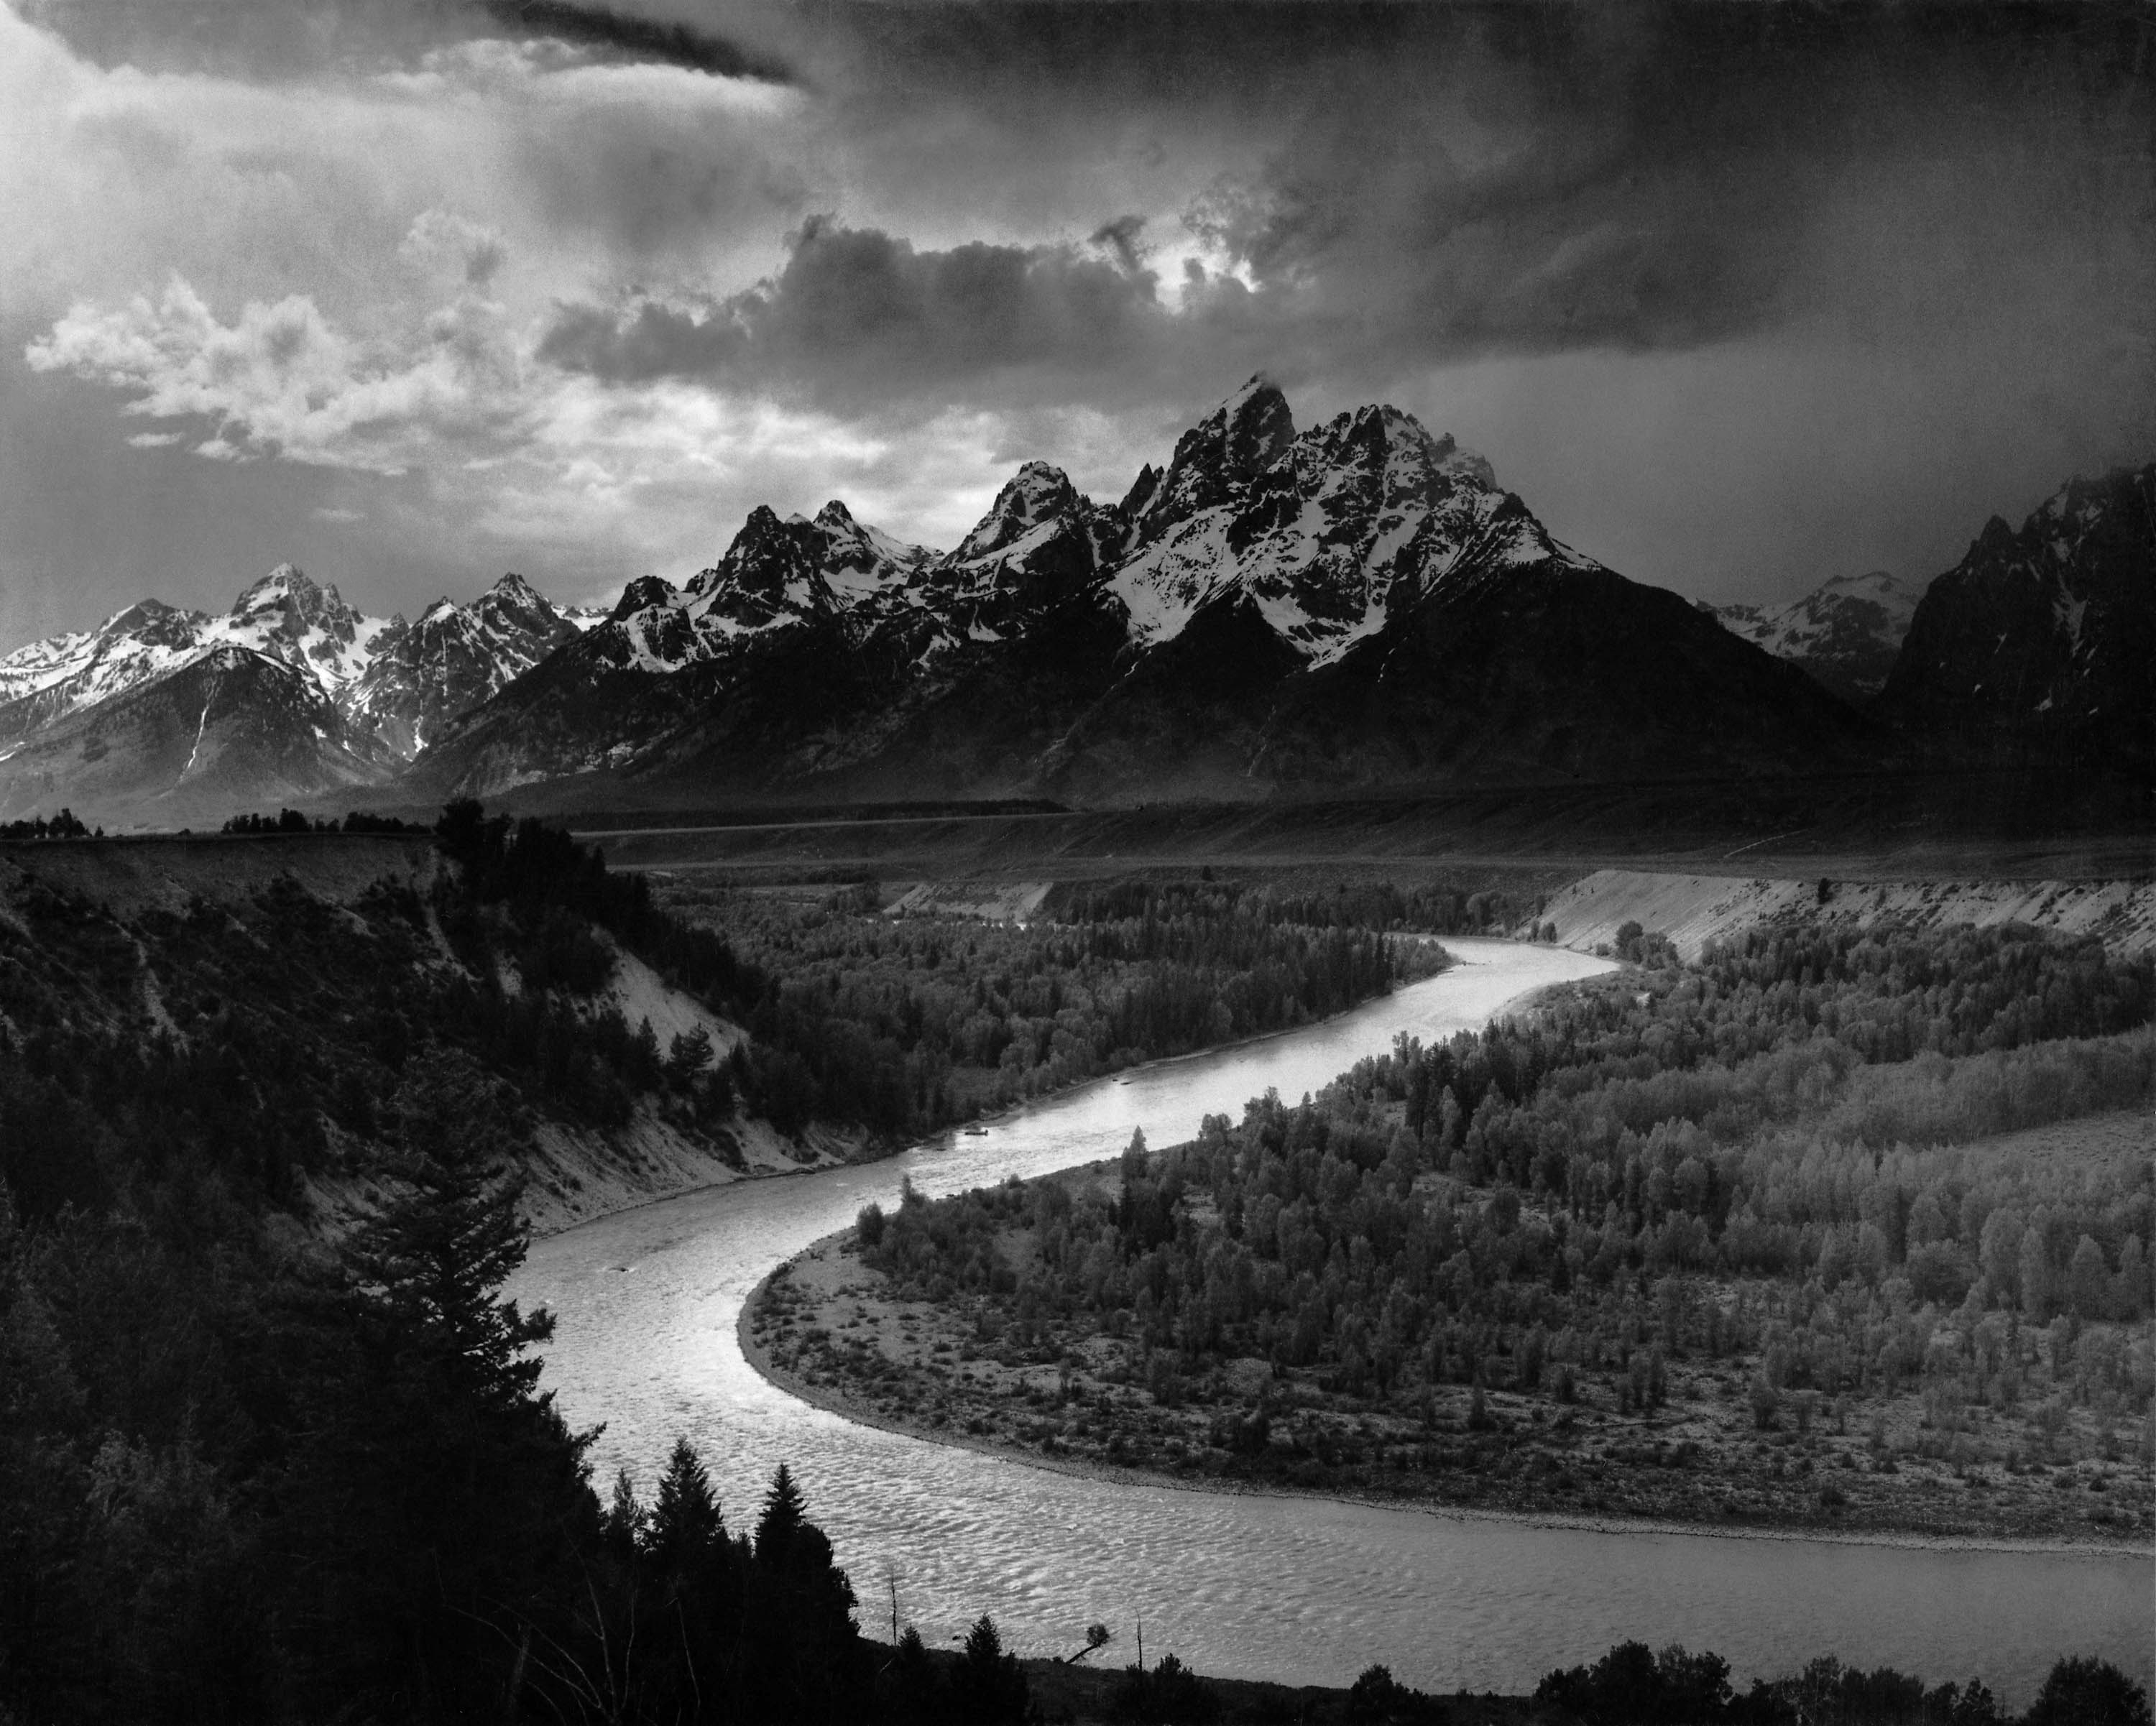
Image by Ansel Adams for the National Parks Service 1942"1940-1949 – National Parks and Monuments" describes the time period in which Adams was commissioned by then U.S. Secretary of the Interior Harold Ickes to photograph the national parks and monuments for murals to be displayed in the Department of the Interior's new Washington D.C. headquarters. It was during this time period that his work grew in different geographic directions beyond California and the Southwest, branching out to other locations across the country.

"1950-1959 – Conservation, Publications, and Commissions" focused Adams' attentions on photographic commissions and writing. It was during this time that he wrote the many technical books that became standard course materials, even to this day. He also spent time working on conservation issues with the Sierra Club as well as mounting exhibitions for them.

It was in 1956 with the help of Nancy Newhall that the exhibition "This is the American Earth" was presented. It was later turned into a book with Newhall's poetic text, and characterized as a wake up call to the nation for environmental issues.

"1960-1968 – Carmel" examines the time in the life of Adams, that although he photographed less and less, he printed more and more. Adams never worked with a lab as did many of his contemporaries. He made every print himself. During this time, when he was not printing, he was writing, teaching, and tackling conservation issues.

"Notes on Selected Photographs" contains information on selected images from throughout the book. There are over 75 images that contain comments, history, and other interesting insights into the artist. 400 Photographs is fully indexed by title and by subject. There is also included a bibliography of both Adams' work as well as works on Adams.

When I was growing up, my doctor had an Adams mural on the walls in one of his patient rooms. The image to me was enormous. Even more, the impact on me of this image was enormous. It has shaped the way I viewed photography and in many ways, how I view life in general. When I view the photographs in 400 Photographs, I get this same feeling.

Sure, the small images that are presented in this book cannot replace the feeling that one gets when you see his full size presentations, but that is not the purpose of this book. 400 Photographs is about presenting a body of work from someone who chose not to make photography fit into the notion of the pictorial art of the day, but instead made photography into an art form that could stand on its own. That is what makes this book so important.

I think that Ansel Adams: 400 Photographs is an absolute must have for anyone that enjoys Ansel Adams, art work, photography, or just wants to get lost into the world of images. It is also a must have for artists from other disciplines as the compositions, arrangement of light, and locations are inspirational. It should also be in every waiting room or patient room as well; you never know whom it will inspire.

Tuesday, September 30, 2008

Book Review: Photo Workshop - Portrait and Candid Photography by Erin Manning

Written by T. Michael Testi

Creating portraits is a combination of skill and technique. It is also about connecting with your subjects. By learning how to observe and understand those you are working with you will get a feel for who they are, and how best to present them in a personal light. Learning to find out what interests you about your subject will allow you to better capture their personality.

It also takes time to learn the creative techniques of composing your images by experimentation, and through the capturing a lot of images; by learning how to tell a story with your image. Portrait and Candid Photography is 272 pages divided into 10 chapters.

Chapter 1, "What You Must Know About Photographing People," begins by showing you how to observe and connect with people. Here you will learn how to compose your images, to see what your eyes see, and learn about working with light in general. Then you will explore the kinds of equipment cameras, lenses, and equipment you will need. Chapter 2, "Accessory Equipment," will now take you into more detail with equipment such as additional lenses, batteries, tripods, flashes, and other odds and ends.

Chapter 3, "Working with Light," will get into more detail about working with light by exploring the quality, direction, intensity, and color of light. Then you will see how to reflect light, defuse light, work with a flash, and work with a meter for exposure. Chapter 4, "Composing your Picture," examines the basics of composition. This includes working with colors, framing your image, using patterns, using perspective, focus, and point of view.

Chapter 5, "Taking Portraits," will have you creating the look that you want by choosing the correct background, adding props, and adjusting wardrobe. You will see how best to take advantage of light, see how best to work with your subject by experimenting with position, changing points of view, and even how to capture candid moments. Chapter 6, "Families, Groups, and Parties," begins by showing you how to prepare for the shoot. Again you need to know the location, the people, the lighting, but it is just as important to anticipate surprises.

Chapter 7, "Kids," provide a unique test because they can be unpredictable, but here you learn about the different ages and stages that come with them. You have to keep it real, but yet get them involved to get the best shots. Chapter 8, "Babies," require timing and being prepared. You have to create the right environment to get the best shots. Here you will see how to prepare the site so that you can capture the moment and make it meaningful.

Chapter 9, "Action Shots," takes you in a different direction in that this, many times is all about lens speed and timing. It is about freezing the action with techniques like using fast shutter with flash, and about blurring action by using slow shutter with a tripod. Chapter 10, "Enhancing and Sharing your Photos," examines how to manage your images by using various software products, how to enhance and repair your images, and finally how to share your images via slide shows, email, websites, and printing.

Aimed at the beginner user, Photo Workshop: Portrait and Candid Photography is very easy reading, and develops through a well defined, logical progression covering most aspects of shooting portraits on a casual basis. Not being aimed at the professional, it does not try to tackle too much like lighting layouts and other more complex discussions.

While I wish that it went a little further in explanations of the relationship of ISO, shutter speeds, and aperture, it does a very good job of presenting the fundamentals. Additional things I like about Portrait and Candid Photography and the series in general is that most of the photos have an "about this photo" caption where, when appropriate, the technical information is presented about the image.

The other thing is the lessons and exercises that give you an opportunity to interact with the book. Portrait and Candid Photography provides a great overview of portrait photography and the subject in general. If you are a beginner or getting back into it and want a good refresher course, then Portrait and Candid Photography will fit the bill.


Technorati Tags: ,,

Wednesday, September 17, 2008

Software Review: Adobe Photoshop Lightroom 2

Written by T. Michael Testi

Adobe Photoshop Lightroom 2 is the much anticipated second version of Adobe's highly praised photo management and editing system. Photoshop Lightroom 2 adds new editing tools as well as enhances the existing environment, while at the same time reduces the dependence on Adobe's Photoshop.

On the outside, Photoshop Lightroom 2 retains much of the look and feel of its predecessor, while providing many workflow improvements that will have current users singing its praises. As well as the expected improvements to existing functionality that one would anticipate in a version two product, there are also a lot more features to improve your importing, processing, managing, and the showcasing of your images.

Lightroom 2

Before we look at the improvements and enhancements, what do you need to run Lightroom 2? You will need Windows XP SP2 or Vista on an Intel Pentium 4 - 1.4 GHz or higher, or Mac OS X 10.4 or 10.5 on PowerPC G4 or G5, or Intel Based Processor, 1GB RAM 1 GB hard drive space, 1024x768 display, and CD-ROM Drive.

For those who are new to Adobe Photoshop Lightroom, I find that there is still some confusion between Lightroom and Photoshop. The basic difference it that Photoshop is an image editing program. It has the big guns to do just about anything you want to an image. What it doesn't have is true image management, organization, and workflow processing that a photographer might want and need. Sure, it has Adobe Bridge, and that works great to a point, but for someone who is a photographer; whether professional or hobbyist, it really is not enough.

That is where Adobe Photoshop Lightroom 2 comes in. It has all of the things that Adobe Bridge was missing; these include things like advanced file management, enhanced printing capabilities, and easy web output. Lightroom then adds much of those image processing capabilities that Photoshop contains and are used by photographers. It puts it all into a single package.

Does that mean that you no longer need Photoshop? For some that answer would be yes. In fact Adobe Photoshop Lightroom 2 is the better choice, especially for those who do not do a lot of advanced processing. For others, Lightroom is a better way to get to that point where they send their file to Photoshop for additional enhancements.

So what is new with Adobe Photoshop Lightroom 2?

• Local Adjustment Brush - gives you a more flexible method to apply more accurate enhancements by targeting a specific area of a photo for dodging, burning, as well as other local adjustments. Make exposure, brightness, clarity, or other enhancements exactly where you want them.

• Multiple monitor support - now can take advantage of a second monitor attached to your system. You can configure your workspace to manage image workflow and presentation more effectively. You can open a view of say your Library module in a second monitor while working on printing in your first monitor.

• Extensible architecture - gives you the accessibility of the wide range of plug-ins to help you quickly and easily transfer your images to your favorite sharing sites and photo labs.

Lightroom 2

• Volume management - allows you to manage and organize your images across multiple drives and continue to work with the high-resolution previews; even when your originals are off line. A Volume Browser lets you check the status of local and networked volumes at a glance.

• Smart collections - can be created based on metadata rules that you specify. Smart collections automatically stay up-to-date with the photos that meet the criteria that you specify.

• 64-bit processing support - lets you utilize the advanced memory handling capabilities of the latest Mac OS and Windows based systems.

• Improved organizational tools - now lets you sort and filter large volumes of photos using powerful metadata filters that let you quickly find the photo that you want.

• Better nondestructive photo editing - lets you adjust and enhance color, exposure, and tonal curves nondestructively on more than 190 camera raw file formats, as well as JPEG, TIFF, and PSD files.

• Enhanced Photoshop CS3 integration - now works with Smart Objects, panorama stitching, High Dynamic Range (HDR) functionality, multiple layer workflow and more. Your work in Photoshop is automatically updated in Photoshop.

• Improved Batch Processing - lets you quickly import large volumes of photos from cameras or camera cards, and automatically renaming files, organizing them into folders, and making nondestructive adjustments.

• Enhanced Output Sharpening - will help you improve the appearance of your photos with enhanced algorithms that can automatically sharpen photos when you export files or output print and web creations.

• Better printing - now gives you more ways to quickly arrange a photo for printing multiple sizes on one or many pages, with more flexible and customizable templates to better use your paper and ink resources. You can create picture packages that contain one photo in a variety of sizes on a page.

There are a lot of improvements in Adobe Photoshop Lightroom 2. To begin with, the better disk-based management and volume monitor. Now there is a more disk-based browser to the folders where your images are so you can more easily see where everything is. It will even let you know when your disk is getting full.

Then there is the smarter keywording. Key word suggestions are now much more intelligent. When you use a lot of words in combination, Lightroom remembers and by using one, the other common ones are moved to the top of the list.

Lightroom 2

I love the localized adjustments in the Develop module. You can paint an area in which you want to make your adjustment. Once you have your area brushed in, you adjust it further to intensify or reduce the effect. The fact that you can open your files in Photoshop as Smart Objects to tweak your Lightroom adjustments is wonderful. You can merge multiple exposures to a single Photoshop HDR. Select multiple images to merge as a panorama. The list goes on.

While I was disappointed that third party filters were not included in Adobe Photoshop Lightroom 2, there is a little crack in the dike, in that there is an export module plug-in framework that will let you export your photos to a website, assuming there is a plug-in available. Adobe has even created an exchange site for those who want to list their plug-ins so perhaps this will be a feature in the future.

Overall, I think that Adobe Photoshop Lightroom 2 is a significant upgrade or new purchase. The upgrade is $99, and as a new purchase it sells for $299. If your focus is photography, this upgrade really expands on the base functionality of version 1 and makes it a must-have, in my opinion. While I will continue to use Adobe Photoshop for my heavy duty work, when dealing with photos, my first stop is always Lightroom.


Tuesday, May 27, 2008

Book Review: Practical Artistry - Light and Exposure For Digital Photographers by Harold Davis

Written by T. Michael Testi

The amount of power and capabilities in today's digital cameras give you a lot of technical sophistication, but all of these features alone will not guarantee the capturing of a compelling image. To do that, you have to have more than just technology, you must have skills. To do it well you must be one part photographer and one part digital artist.

In Practical Artistry: Light and Exposure For Digital Photographers, Harold Davis' aim is to present the best practices of the craft of photography in the context of the digital era. A great photograph begins with the photographer's understanding of light and proceeds with a good and creative exposure. Practical Artistry is 176 full color pages that are divided into six chapters.

"Understanding Exposure" begins with the exploration of what is an exposure, especially with regard to the capturing of light. Here the discussion is about the relationship of aperture, shutter speed, and light sensitivity - also known as ISO. Here you will learn about the exposure equation, measuring light, and intentional over- and under-exposing of images.

"Working with Aperture" provides you with a solid foundation of understanding what f-numbers are and how f-stops work. You will see how aperture and depth of field relate, how to work with selective focus, when aperture does not matter, and how it relates to macro photography.

"Selecting Shutter Speed" is all about time and how shutter speed is really about the duration of time that the shutter is open. The discussion is about the affects of time in the photographic equation, about shutter speed and camera shake, subject motion, and the creative use of motion.

"ISO and Noise" explains where camera noise comes from and how it relates to light sensitivity. You will see when to boost ISO, how to use noise creatively, and how you can reduce noise in post processing.

"Using Light" gets in to the use of light in the capturing of images and how a creative exposure can lead to a creative image. By finding the best light for a given composition, you will be able to create your best images. By being a student of lighting situations, you can gain an understanding of how light sources interact with each other and the external situations. You can also enhance the existing light by the use of artificial light sources as well. Here you will learn about white balance, front lighting, side lighting, back lighting, overcast lighting, night lighting, and flash lighting.

"Digital Darkroom" is all about post processing. Here you will learn about working with Raw Conversion, adjusting exposure, white balance, working with noise reduction, multi-Raw production, cross processing and working with black and white.

What I like about Practical Artistry is that it gets back to the basics about photography and does it in the digital age framework. In the old days before the advent of built-in light meters, a photographer had to understand the photographic equation; the relationship between aperture, shutter speed, and ISO. These techniques still are relevant today with the digital camera.

This instructional book is richly illustrated with full color photographs from the author. The text is explained clearly and in detail with an accompanying photo to illustrate the effects of decisions made.

Practical Artistry is a great book for anyone who wants to understand the traditional methods of photography within the realm of the digital age. I can easily recommend this book.

Monday, June 25, 2007

Software Review: Fluid Mask 2.0 Photoshop Plug-in - From Vertus

Posted by T. Michael Testi

Have you ever wanted to extract something from a photo, either to add it to another photo or to change the background? Have you spent hours trying to use one of the lasso tools in Adobe Photoshop only to quit in frustration because of all the complex curves? You do not have to feel frustrated any longer.

Fluid Mask 2.0 is a plug-in for Adobe Photoshop versions 7.0 through CS2; version 3.0 is in public beta and will be available for version CS2 and CS3. There are versions for Microsoft Windows and Apple Macintosh. Fluid Mask 2.0 also works with Photoshop Elements, but you will need to pay attention as the installation is different in that case.

Fluid Mask 2.0 is a set of advanced paint tools that cut out highly complex images with absolute precision. This is what Vertus' claims, and this is exactly what it does. Not only that, but it does it with remarkable ease and absolutely no pain! For many of your cut-out needs, you just paint the area in that you don't want in wide brush strokes, and push a button and it's gone. If you need to be more selective, you work similar to painting by numbers to select the areas and then still push the button and its gone.

Fluid Mask 2.0 works best with RAW files; next best is PNG's. While it works with JPG's, their use should be avoided if possible as they are too lossy and they don't have all of the information to do the best job.

One thing to note is that you do need plenty of memory to work with Fluid Mask 2.0. Depending on the image, it can use five times the size of the loaded image because of techniques used to parse your image into the individual objects.


As you can see from the animation below just how easy it is to take one picture and cut out pieces and insert others to create the image that you want. This is great for manipulating stock photos to get just the shot you need.


Buy Fluid Mask
Vertus: Fluid Mask cut-out tool


There are certain images that cannot be used with Fluid Mask 2.0. One such image is an 8-bit per channel image. While 8-bit images worked within version 1.0, Fluid Mask 2.0 requires 16-bit images. If you have an inappropriate image loaded the menu option will appear as grayed out. The image detail needs to also be in RGB or CMYK mode, so, to use the plug-in you may need to do some additional conversion.

The regular price of Fluid Mask 2.0 is $199 USD. On July 2, 2007, it goes up to $239 USD. Between now and then, if you buy version 2.0, you will get a free upgrade version 3.0 when it is released. You can also play with a 30 day trial version as well. They have a full set of tutorials on their website as well as technical support, a Vertus community forum as well as free daily on-line training five days a week!

In the past I have struggled for hours trying to do an okay job of what this product will do in minutes, perhaps seconds once you get the hang of it. In my opinion, if you regularly create cut-out images, Fluid Mask 2.0 is a must have. Period!